
We are going to make this kind of abstract art in GIMP today with this little tutorial.
Step 1:
Load up GIMP and select Create a New Image, yes the resolution can be adjusted to any resolution of your choice. I selected 1680x1080 cause that's how big my monitor is. Go into Advanced Options and select, "Fill with:" and select Foreground Colour.

Step 2:
To get the Layers dialog box to show up press CTRL+L. Once that is up, right click inside the Layers and select New Layer. If that doesn't work or you're on a Mac. Click Layer > New Layer in the main window.

Step 3:
When the New Layer dialog box pops up, make sure it's on Transparency or this tutorial will not work.

Step 4:
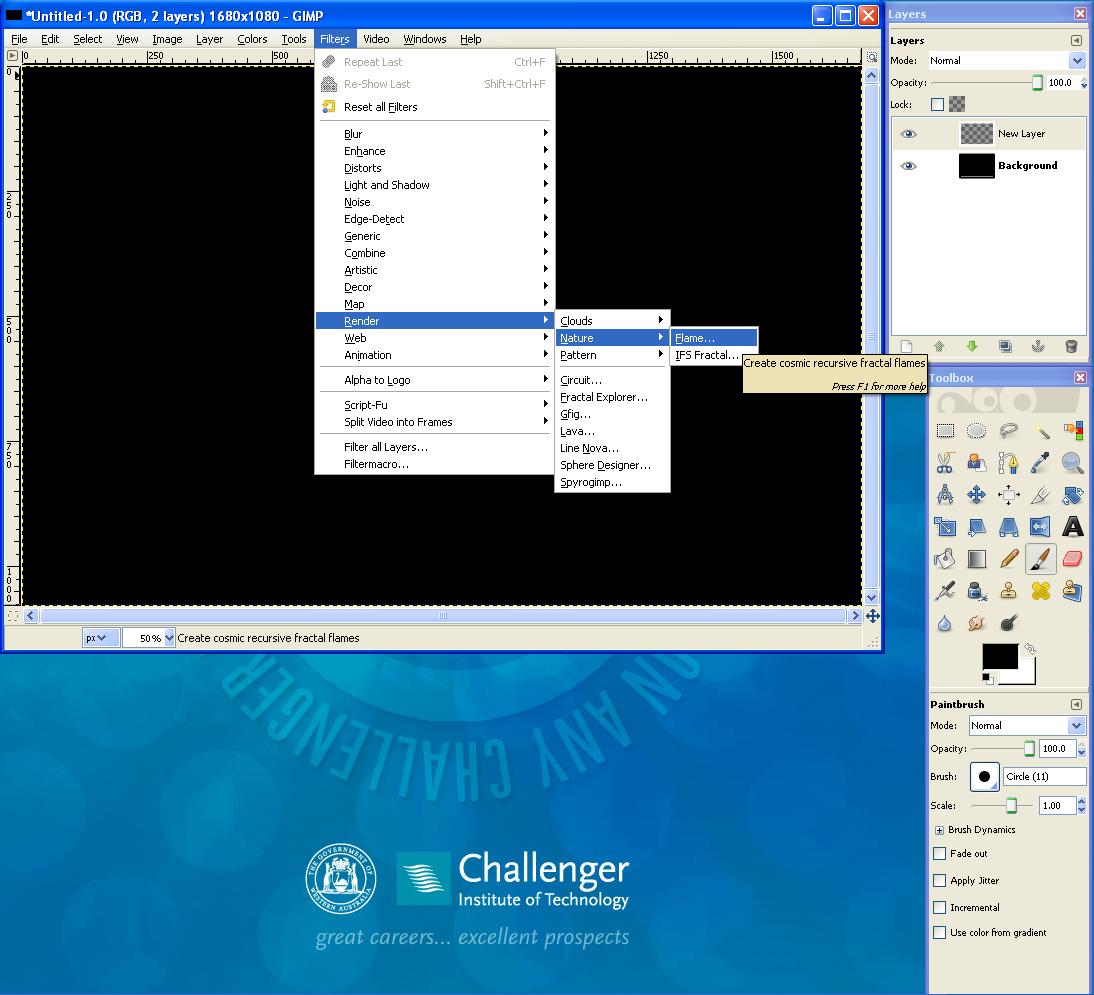
Now that we have a blank transparent layer, we now select, Filters > Render > Nature > Flame for the main part.
Step 5:
Now we move onto the Flame dialog box, here we set the brightness to 2.00 and the Contrast to 1.50. After that, leave it.

Step 6:
From here we move onto the Camera tab, as long as it's not in the negatives or over 2.00 then it's fine. So this whole bit is completely optional but I recommend setting it to at least 1.50 or 2.00.

Step 7:
Now we hit the Edit button, of course you can set the speed to whatever you want but for my favourite images I set it to 0.40. Of course you can leave it at the default now keep selecting Randomize till you get a small preview picture you like and then click it on the 9 windows. You can either keep clicking it to keep it the same or click Ok.

Step 8:
Now that you have applied it, GIMP will be drawing your selecting, depending on the resolution it can take up to 30 seconds to 5 minutes from my experience. When it has finished drawing you can select Colours > Colour Balance.

Step 9:
Now that the Colour Balance dialog box is up, you can change the Midtone, Highlights and Shadows to any colour experimenting with it. It doesn't have to look like mine but it's still nice. I set a default colour to 100 to maximize the full potential of the picture.

Step 10:
Last but not least remember to go to Image > Flatten Image when happy with your results and save as a .jpg

Just remember, you can do anything with these pictures.
Awesome tutorial you've made there KillerShane !
ReplyDelete